OSINT Investigations  ★    Contact us  ★   
Flickr and Python

How to further automate your Flickr searches?

In part 1 of this blog post, we showed you how to find users on Flickr using an email address. We have shown that you can use the Flickr public API key for this purpose. In part 2 of this blog post, we described how to create your own Python script to automate your searches. In this third blog post, we explain how to clean up your results, how to make your script more user-friendly and how to save your results in a CSV file.

First of all: use a new API key

To use Flickr’s public API, as you know by now, you need Flickr’s public API key. Find this public API key via the Flickr Api Explorer: manually enter an email address such as “johndoe@gmail.com” and view the URL at the bottom of the screen. In our case, this leads to the working URL below. You can then use the API key from this URL in your own Python script. Have you forgotten how to do this? Then read part 2 of this blog post over again.

https://www.flickr.com/services/rest/?method=flickr.people.findByEmail&api_key=3eeb03cea945a8f597c529ebd454051b&find_email=johndoe%40gmail.com&format=rest

Cleaning your Python script

If you have followed all the steps from our second blog and you have included a new public API key in your Python script, you can use your script to check whether a user is linked to the email address you have provided. Before continuing, it is useful to test this. Is everything working? Then read on.

Step 1: check the result of your script

When you view the result of your script, you can use the result to think about how you can improve your script to filter out irrelevant information. For example, in the results below you will see a “response code” with the value “200“. Although this result indicates that your request to the web server was successful, this information has no further value if we only want to know whether a user is linked to an e-mail address. So we are going to clean up our script in such a way that we will only get the “user id” and the “username” back.

Python resultaat

Step 2: install the Python library BeautifulSoup

Before cleaning your script we install the Python library “BeautifulSoup“. The BeautifulSoup Python library allows you to extract data from an HTML or XML file and to present it in such a way that Python objects are easy to walk through. Install the library via your Windows Command Prompt (CMD) as follows:

pip install beautifulsoup4

Step 3: import the Python library BeautifulSoup

Import the BeautifulSoup library by including the following code into your Python script:

from bs4 import BeautifulSoup

You will see the text “from bs4 import” in the above command. This section indicates that you only import the object “BeautifulSoup” from the “BeautifulSoup library“.

Step 4: install the lxml-parser

BeautifulSoup can be used with “parsers” like the “html.parser” and the “lxml-parser“. Parsers “parse” messy or incorrectly formatted HTML code to make your results look more structured. Does this sound a bit vague? No worries, this will become clear later on. Install the lxml-parser as follows via the Windows Command Prompt (CMD)

pip install lxml

Step 5: import the lxml-parser

Import the lxml-parser into your Python script as follows:

import lxml

Step 6: create a Soup object

To run BeautifulSoup, use the command below.

#create soup
soup = BeautifulSoup(response.text, 'lxml')

In the code above, the first part “response.text” is the HTML text on which the object “soup” is based. After all, the “response.text” was the result of the requested HTML page as we specified earlier. The second part “lxml” specifies the parser BeautifulSoup should use to create the object “soup“.

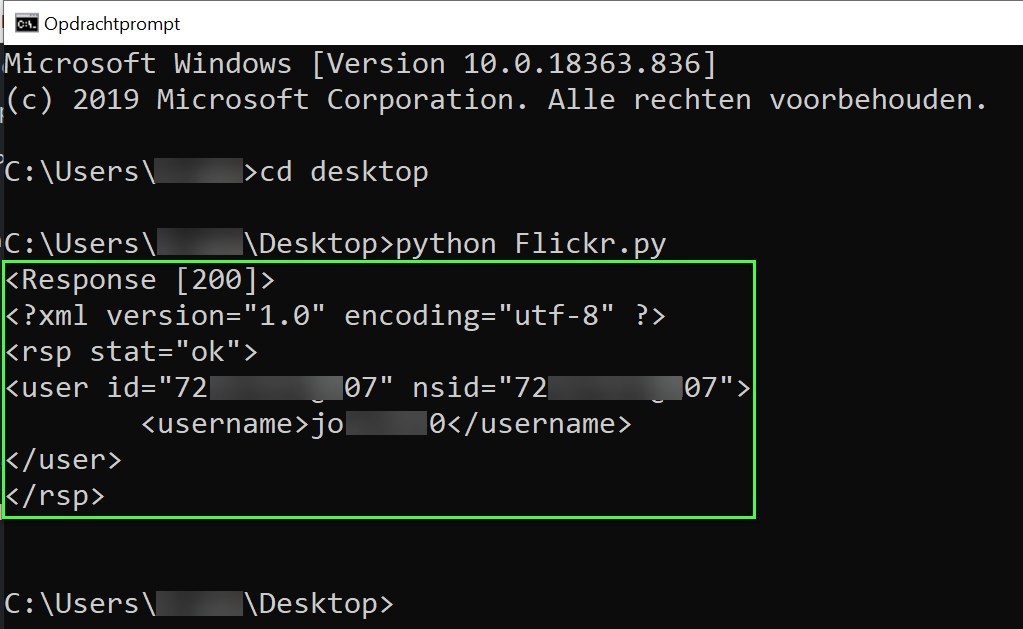
Step 7: print the Soup object

To test if everything works fine you can now run your script. Our script currently looks like this.

Python print soup

And gives us the following result:

Python print soup resultaat

So this script works. And if you look closely you will see that the result looks slightly different from the previous result. For example, you will now also see the sections “<html> <body>” and “</body> </html>“. This makes sense, because you have requested the HTML content of a web page.

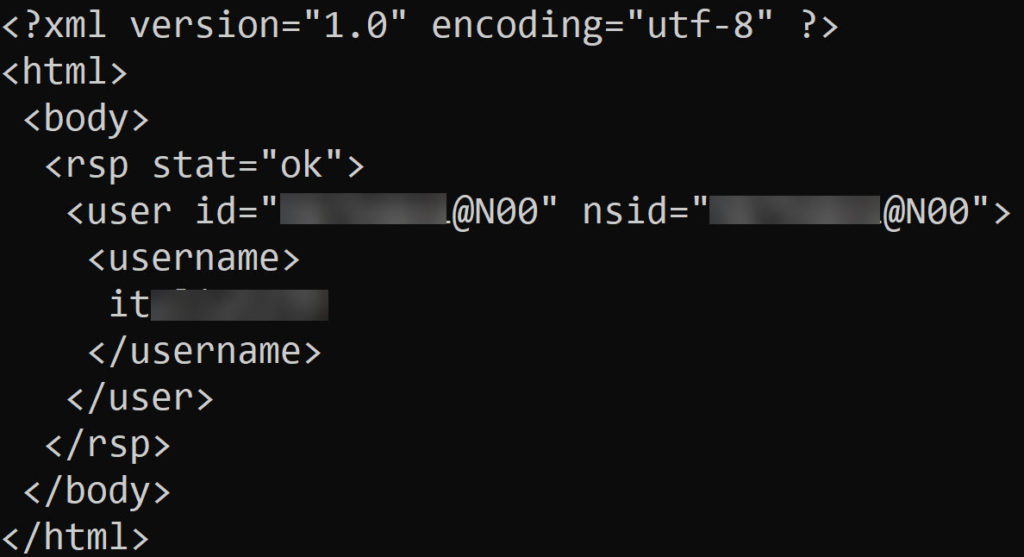
Step 8: use “prettyprint” for nicer results

To make your results more beautiful (in a “nested structure“), you can use the command below

print(soup.prettify())

This gives you the following result in which the HTML structure is nested. That is to say, for example, that “<rsp stat =” ok “>” up to “</rsp>” fall under the “<body>” of the HTML page.

Python print soup resultaat pretty

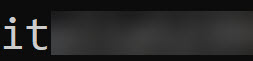
Step 9: filtering the print results

With the code above you are not there yet, after all you just want to print out the user ID and username of your targeted user. For this you need to look in the HTML where exactly the information you are looking for is stored. For example, if we start with the username, the username is immediately shown between “<username>” and “</username>“. You can then point to exactly this part in your script using the command below.

#filter results
user_name = soup.username.text

The above command searches for the text part which is located in the following structure: html> body> username. By using “soup.username.text” you directly call the value of the object “username“, which in this case is the username. If you want to print the variable “user_name“, you can do this as follows:

print(user_name)

The result you will see is only the username:

Python print soup resultaat pretty user_name

Step 9: add text to your results

Your script now does exactly what it should do: it shows an user’s username based on an email address that you have provided. You can use the command below to clarify the result you will see. So you can enter text yourself.

print('\nUsername:',user_name)

The result will look like the following:

Python print soup resultaat pretty user_name met tekst

Step 10: adding multiple filters and printing the results

With the code above you have only printed the user name, but you also want to know the user ID. You can use the code below.

#filter results
user_name = soup.username.text
user_id = soup.user
user_profiel = ('https://www.flickr.com/people/'+user_id.get('id'))

#print results
print('\nUsername', user_name)
print('User ID:', user_id.get('id'))
print('Flickr-profile:', user_profiel)

If you now print everything, you will get the result below.

Python print soup resultaat alles

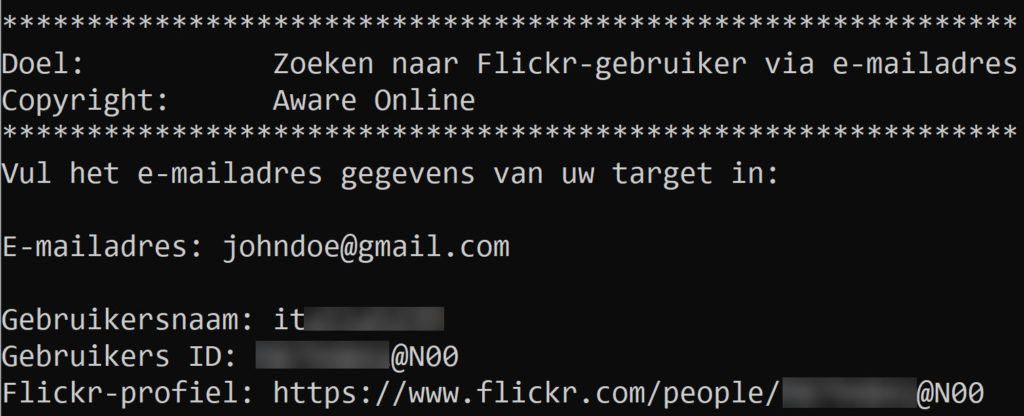
Making your Python script user-friendly

At this moment your Python script works, but is not very user-friendly yet. You always have to change the code of your script to make it work, and you have to do that for every email address you want to check. So it’s time to make your script more user-friendly.

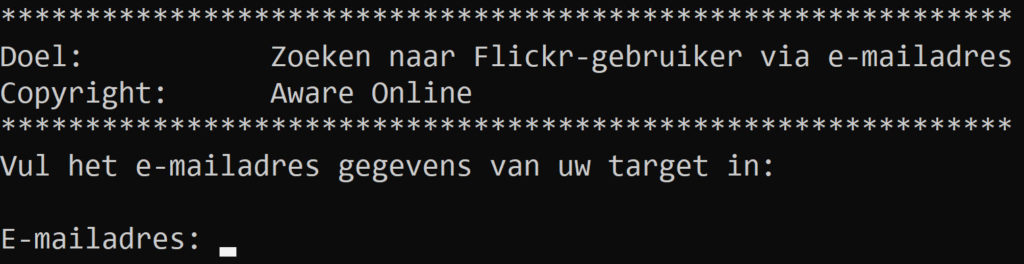
Step 1: create your own fancy template

Many scripts have a nice logo or text in the beginning. A script looks much more exciting with some fancy colors or words. You can ann some text very simply as follows.

print()
print('\n*************************************************************************************'
'\nPurpose: \t\tFind Flickr profiles by email'
'\nCopyright: \tYour Name here')
print('*************************************************************************************')

If you print the script now, you will get the following result. Isn’t that cool?

Python startscherm

Step 2: create new input variables

The script you have created is currently quite static. The script contains the API key of Flickr and the email address you want to investigate. If you want to use the script more often, you may want to use the API key and email address as an input value to store in a new variable.
For the email address you can do that as follows, let’s just leave the API key for now:

print('Fill in target email:\n')
emailadres = input("Email addddres: ")

Please note that you will also need to edit the URL in your code. After all, you want to use the email address you enter via the input field in the URL you are going to visit. This can be done as follows.

url = 'https://www.flickr.com/services/rest/?method=flickr.people.findByEmail&api_key=3eeb03cea945a8f597c529ebd454051b&find_email='+emailadres+'&format=rest'

If you now print the result, you will be asked to enter an email address of your target. You can do this manually, after which the script will continue to run as before.

Python email input

Save the results to a CSV file

You can use your script to check whether an email address is associated with an account on Flickr. By running your script you will see all of the results in your terminal. Sometimes it is more convenient to immediately save the results found in a file with which you can continue working. For example, in a CSV file. Below you can read how to save your results in a CSV file.

Step 1: install the xlwt library

To generate spreadsheets that can be used in Microsoft Excel, a Python library like “xlwt” is needed. This Python library can be installed through the Windows Command Prompt (CMD) as follows:

pip install xlwt

Step 2: import workbook from xlwt

From the Python library xlwt we need the object “workbook“. You can import this object as follows.

#import workbook from xlwt library
from xlwt import workbook

Step 3: create a workbook

Using the Python library, you can create a workbook as variable “wb” as follows:

#create workbook
wb = Workbook()

Step 4: create a spreadsheet

Now that you have created a workbook, you can create a spreadsheet. You can do this as follows:

#Create a sheet via add_sheet
sheet1 = wb.add_sheet('Sheet 1')

With this function you have created a spreadsheet and named this spreadsheet “Sheet 1“.

Step 5: fill the spreadsheet with your data

Now that you have created a spreadsheet, you can specify what should be written on the spreadsheet. You can do this as follows:

#Fill in spreadsheet
sheet1.write(0, 0, 'Email address')
sheet1.write(0, 1, 'Username')
sheet1.write(0, 2, 'User ID')
sheet1.write(0, 3, 'Link')

The comma values indicate which “cell” you are in on the spreadsheet. So the value “0.0” indicates that you are in cell “A1“. If you want to select cell “B1“, you simply move one place to the right. In your code this means that you will have to write “0,1,“. The value that you display between quotes ‘E-mail1‘, indicates what will be in the cell. In this example, cell “A1” has the value “E-mail address“. With the code below you can then enter the values based on what your script has generated.

sheet1.write(1, 0, emailadres)
sheet1.write(1, 1, user_name)
sheet1.write(1, 2, user_id.get('id'))
sheet1.write(1, 3, user_profiel)

Step 6: save the document

Before running your script, you must save the above effects in a file. You do this as follows, in this case with the name “flickr_result.xls“:

#save document
wb.save('flickr_resul.xls')

The end result looks like this.

Python csv

What’s next?

With the above steps, you have created a basic Python script that allows you to check if a user on Flickr is associated with one specific email address. You have cleaned up your results, you have made your script more user-friendly and you have saved your results in a CSV file. In a subsequent blog post, we will explain how to scrape the information from a specific profile, and how to import and process multiple email addresses. Do you have any tips or suggestions? Please let us know!

Previous PostNext Post

Leave a Reply

Your email address will not be published. Required fields are marked *

This site is protected by reCaptcha and the Google Privacy Policy and Terms of Service apply.